6.11.2012

Carbon Transfer II


In Susan Cain’s TED Talk, she spoke of introverts and extroverts and the power of both. I think our world of creativity has become extroverted. We are being condition and taught that our image in the eyes of others is more important than our own image of ourselves. So in photography, it’s all about ‘putting’ oneself out there, about competitions, about having the appearance of a professional, about having a following, about having ‘likes’.

The unfortunate consequence is that we can truly not admit we know nothing, or are a rank beginner and feel good about it. Contentment with one’s level knowing that growth lies ahead with work and time is an enlightenment reserved for the few. More common is the purchase of a digital camera, followed by an online photo-site account, then maybe a personal website. As instantly as the images appear one becomes an instant Artist. A Photographic Artist. It’s as easy as the Auto Mode you use in your camera.

The result is banality. Millions of mediocre photos of sometimes pretty things - way too many birds, flowers, and sunsets. But, it does get you the most ‘like’s’ - the extrovert’s reward. Photography today is like a super obese sugar addict sitting in front of a table filled with cakes and pastries. They can’t stop eating and the instant gratification of the taste buds trumps any thoughts of the consequences. The sugar addict gets a quick fix but is never happy.

For some, photography is a hobby or social endeavor - it is fun, light, and easy. Others who are driven to create may find that they don’t know why they have to take photos. Trying to understand the inexplicable, they often turn outwards and very unfortunately get sucked into the artstyle of the mediocre masses.

Growth comes from introspection and from education. Education can be as simple as a critique, or a pile of books and classes. There are millions of classes and books on Photoshop, a few thousand on learning the “rules” of composition (or how to put yourself in a little box), and maybe a handful that teach you how to discover your reasons, motivations, and direction of your creativity.

After 35 years of taking black & white photos with film, I went digital in 2006. Joined a photo club, one with an appropriate number of moronically stifling rules. Used an online photo-site. Even got a webpage and wrote an “Artists” bio. But nobody could every answer the one question I kept asking: Why?

Why? I think that was the first word out of my mouth, just before mama. Why? People don’t like that word; it puts them on the defensive. But how can you do anything if you don’t know Why?

So, I turned back to myself. I’m an introvert so it wasn’t too difficult. I may not absolutely know why I am driven to take pictures, or be creative, for that matter. But, I know it gives me great satisfaction to make things. I like to use my hands as well as my mind. I built an airplane - 12,000 rivets into 12,000 holes. I’ve written stories. I bake french bread.

Thinking, I now understand why I like to show people my photos, or taste my bread. It is about sharing the positive experience that I get from the things I make. More people like my french bread than my photos, but that has to be expected. My bread is crusty, warm, with flavor that piques ones warm & fuzzy buttons. My best photos, that is, the photos I like the most are a bit odd, often with mentally dark overtones, or simplistic geometric concepts.

Getting to that introspective place where you show creations to share what’s in your mind is a first step towards education. When you only care what you think or feel about a photo, but enjoy others’ enjoyment, then you now own your creativity. Not everyone can relate. Often not those with closed minds or the masses caught in the wave of instant photographic mediocrity. Conversely, it doesn’t matter how many people like your image if you don’t like it.

Enter Carbon Gelatin Printing.

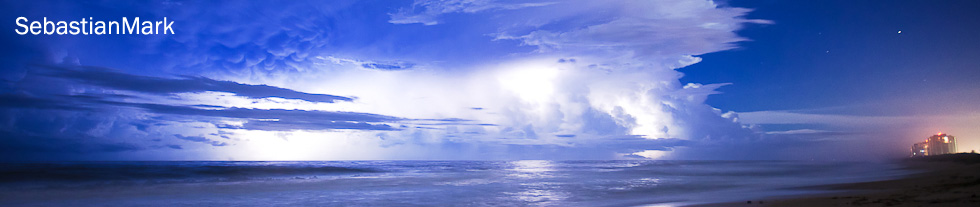
I said I like the idea of crafting with both my mind and body. I’d be a painter if I could but I don’t have the mental skill. It’s much harder to take a photo than it is to paint a picture. Painters get to start with a blank canvas and add the elements. A photographer has to see all of the elements and minimize those detrimental while emphasizing those significant. A photo succeeds less often. It’s why I love photographing at night.

In my Carbon work, the capture is digital, and that’s ok - a camera’s a camera. The initial darkroom is the computer with the first print being a large negative on transparency film. Making carbon tissue is a bit like cooking, and then it becomes an industrial coating process. Combining and UV exposing the negative and carbon tissue is hands-on, as is the developing in a tub of hot water. The image appears slowly as the hot water melts away the unexposed and unhardened black or brownish gelatin.

Every now and then a carbon print comes out quite fantastic. It’s a real achievement. It makes one feel good. I’m talking happiness. The kind of happiness you feel when you do your first solo flight in a small airplane; not to be confused with what people experience when they buy a new car or iphone, or get 5 likes on fb. Printing one good carbon print beats printing five hundred inkjet prints - just ask the fat man eating cake over there.

5.29.2012

Carbon Transfer (Carbon Gelatin)

Time to post some pictures of some pictures. Made using a combination of digital capture, digital print-sized negative, and an 1865 india ink (carbon based) and gelatin process.

The why’s of the post will follow following, suffice to say that the process represents a de-evolution relative to superficial instantaneous electronic gratification common to most and a reawakening of the energies that lead to satisfaction and contentment. Too philosophical, yes well…

The few photos posted are the learning phase. Buying already made carbon gelatin tissue, as it is called, exposing to ultraviolet light, mating the carbon gelatin tissue to a final support paper, and developing it in hot water in the kitchen while sipping a gin and tonic.

The prints are mostly 11”x14” and each took a really long time to make. In fact, there is no guarantee that it’ll even turn out and not just wash away in a large soup of cloudy blackness. Cool, huh. But when one does work, and it is a good image, you just want to show it to everyone. It’s fun to be 10 again.


5.28.2012

French Bread - Revisited


After a while it has come to fruition, the bread, that is. I certainly can’t take the credit, or really care about credit anyway, but the bread is rather extraordinary. And, so here are some tips for the couple thousand hits due to the ‘French Bread’ title, google based blog, and whatever treatments it receives from their search engines.

Without the aid of a professional steam oven in my small townhome kitchen, I have used the wonderful training received during those formative years in Princeton Day School Intermediate Science classes. It was a rather good school - it even had a planetarium. I call the training ‘good science’.

First: Estimating the moisture content to be about 67% to 70%, water weight divided by flour weight, seems to make a rather perfect combination of fluffy inside and crispy crust.


Degassing: Very important. Squeaking out those bubbles of trapped gases is quick and enables long rises with ever-developing flavors.
Don’t Rush: Have extended the rise, especially the last one to two hours before turning on the oven. Cooler temps, longer rise, more flavor.


Lame: Visit the King Arthur website and get those razor cuts going in the right direction.
Steam: Wetting the dough after cutting, with hot water from a spray bottle taking one’s time about it, being a bit messy, will provide the extra moisture to allow the bread to really rise.


Temps: Preheating to 435 works. After placing the dough in the oven, an oven temp of about 375F to 400F for about 10 minutes is great and causes the wetted dough to really rise. I have a crappy oven. Then, about 12 minutes later after cooking at 430F to 435F, increase to 450F for the last 6 to 8 minutes. Creates an amazing flavor in the crust.

Rice Krispies: So, now there’s a little more ‘hands-on’ time but the reward is a loud crescendo of snapping and popping as the smooth crust crackles like a loaf purchased at Boulangerie Saint Preux walking up Rue Lepic, well almost.

Cheers and Have Fun.

12.30.2011

Baguette Recipe


There are a million bread and baguette recipes out there and I was looking for one that worked in my electric oven in the 78°F of a/c Florida life. I know what a baguette tastes like and how it is made in Europe, and I wanted it here. This recipe has thirty minutes of ‘hands on’ time over a five and a half hour timeframe. “Easy’ is prevalent in our recipes as thirty minutes is unacceptable for most of us. "Easy" recipes are rarely acceptable. In my world, this is easy and much less expensive than a weekly ticket to France. Click HERE for King Arthur Flour professional video link for the ‘easy’ shaping techniques to make the bread great.

Enjoy Munchkin.
Poolish
  • 1 cup cool water
  • 1/4 teaspoon active dry yeast
  • 2 cups King Arthur Bread Flour
Dough
  • 1 teaspoon active dry yeast
  • 6 oz lukewarm water (414 g. water; 600 g. flour; ~69%) *
  • all of the poolish
  • 3 cups King Arthur Bread Flour
  • 1 1/2 to 2 teaspoons salt
*Use ~1 oz less in a humid environment, ~1 oz more in a dry climate, or somewhere in between.

Directions
1.     Make the poolish by mixing the yeast with the water, then mixing in the flour to make a soft dough. Cover and let rest at room temperature for about 14 hours, or overnight.
2.     Mix active dry yeast with the water, then combine with the poolish, flour, and salt. Mix and knead everything together at a lowest speed to incorporate the ingredients (and make adjustments) until you've made a soft, somewhat shaggy dough - it should be cohesive, but the surface may still be a bit rough.
3.     Cover and let dough rest for 30 minutes.
4.     Knead for about 5 minutes on speed 2 of a stand mixer. The dough should then be smooth and elastic showing good gluten development.
5.     Place the dough in a medium-size lightly olive-oiled bowl, cover, and let the dough rise for 3 hours, gently deflating it and turning it over after 1 hour, and then again after 2 hours. The deflating and turning can be done on a lightly floured work surface - the final one should be - stretching it and folding all four sides, tamping gently to degas.
6.     Divide it into three equal pieces. Pre-shape each piece into a rough, slightly flattened oval. To shape, slap/pat gently with the heel of the hand to degas and then pull and fold top 1/2 over, then pull and fold top corners, then small folds from the top with fingers curled over the top edge and the thumb and palms pushing/oscillating forward on the work surface until it forms a smooth and soft long oval.
7.     Cover with towel/plastic wrap or greased plastic wrap, and let them relax for 20 to 30 minutes.
8.     With the seams up (ends right to left), pat out the gas, flattening. Fold top 1/3 over and press in with fingers removing more gas, turn 180° and repeat. Start at one end working to the other end and fold top third+ over and down with one hand (fingers wrap over and thumb buries in), pat/press the dough with heal of other hand to meld and degas, fold & press, fold & press... Repeat, but take fold and seam all the way over to the surface edge.
9.     With the seam-side down, cup your hands and very gently roll the dough into a 16" to 24" log. Finger tips and base of hand stay in contact with work surface when rolling. Start in middle and roll back and forth out to the ends. Place the logs seam-side up onto a lightly olive-oiled or parchment-lined sheet pan.
10.  Cover them with a floured towel/plastic wrap or lightly greased plastic wrap, and allow the loaves to rise till they've become puffy, about 1 to 1 1/2 hours depending on room environment.
11.  Preheat oven to 435°F to 450°F.
12.  Using a bread lame or sharp knife, make 3 to 5 angled slashes in each baguette. Mist the baguettes heavily with warm water to help them develop a crisp crust.
13.  Bake the baguettes until they're a very deep golden brown, 25 to 30+ minutes. Remove them from the oven and cool on a rack. Optimum time and temperature varies with different ovens.

~6 hours

12.29.2011

Bread Lame


Homemade Bread Lame

To make bread rise in our home non-steam ovens, it takes a good cut and some serious water misting. I like stuff that lasts, not plastic or such garbage and after seeing the King Arthur Flour video (link at the end here) I realized how simple a lame was.

So, I made one with stuff I had lying around. All you need is a piece of 1/8 inch brass hex rod, available at your local hardware store, a pack of old-fashioned razors, and optional is a small piece of wood for a handle.

Squeeze the razor by the ends and it will curve and slide onto the hex rod and when in place will not turn or slide. It has a nice curve to get under the dough surface. Add a bend in the hex rod of about 15 degrees for more comfort.

If you want to get fancy, you can fashion a handle - drill it for the hex rod and glue or just add a slight kink in the rod to hold it tight. More fancy, taper it to make the hand feel more yummy. Fancier yet, sand the wood and let some olive oil soak in. And, if you’ve gone this far, might as well rub it with a candle and then a small cloth to melt the wax into the wood for a nice shine.


To view a video of scoring bread, click here to visit the King Arthur Site.

Cheers.